Unleashing the Joy of DIY Construction
Embarking on your first DIY building project is akin to laying the foundation for a journey filled with satisfaction and newfound skills. Allow me to share a story from the early days of my own building endeavours, a time when the smell of freshly cut wood and the sound of hammering resonated with the excitement of creation.
As a budding builder, I undertook my initial project—a sturdy garden bench. The sense of accomplishment that followed the completion was immeasurable. Witnessing the transformation of raw materials into a functional piece sparked a passion for construction that has guided my career for over three decades.
Essential Tools for Basic DIY Building

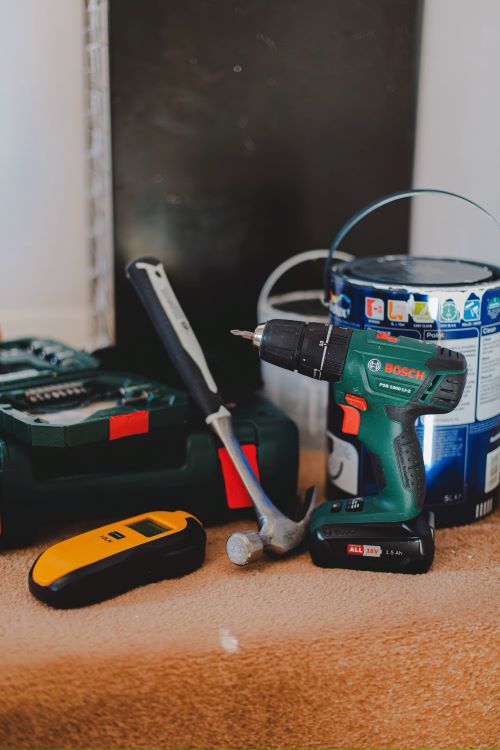
Before diving into your first DIY project, it’s essential to equip yourself with the right tools. Here’s a concise list of must-have tools for basic DIY building:
Measuring Tools
- Tape Measure: A fundamental tool for accurate measurements.
- Combination Square: Ideal for ensuring square corners and straight lines.
Cutting Tools
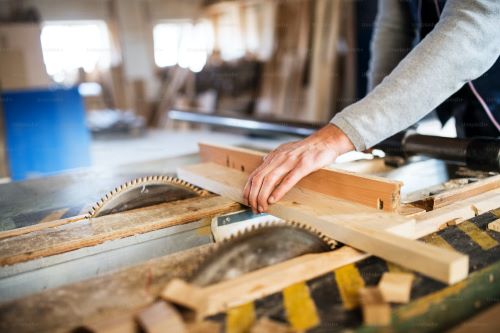
- Circular Saw: Versatile for cutting plywood, boards, and more.
- Handsaw: Perfect for smaller cuts and precision work.
Joinery Tools
- Hammer: A versatile tool for driving nails and more.
- Screwdriver Set: Essential for assembling various components.
Fastening Tools
- Cordless Drill: An indispensable tool for drilling and driving screws.
- Screw Assortment: Different sizes for various applications.
Safety Gear
- Safety Glasses: Protect your eyes from debris and dust.
- Hearing protection is essential when working with power tools.
- Dust Mask: Guards against inhaling dust particles.
Safety First: A Crucial Aspect of DIY Building
As you delve into the realm of DIY building, ensuring your safety should be a top priority. Here are some essential safety tips to keep in mind:
Protective Gear
- Eye Protection: Always wear safety glasses to shield your eyes from flying debris.
- Ear Protection: Use earplugs or earmuffs when operating loud power tools to prevent hearing damage.
- Respiratory Protection: A dust mask is crucial, especially when sanding or cutting materials.
Tool Handling
- Read Manuals: Familiarise yourself with the operation manuals of your tools to understand their proper usage.
- Maintain Tools: Keep tools well-maintained and sharp to ensure safe and efficient operation.
- Proper Handling: Use tools only for their intended purpose, and always follow recommended safety practices.
Workspace Safety
- Clear Workspace: Maintain a clutter-free work area to prevent accidents and tripping hazards.
- Ventilation: Ensure proper ventilation, especially when working with paints, adhesives, or other potentially harmful substances.
Personal Safety
- Clothing: Wear appropriate clothing, including long sleeves and pants, to protect your skin.
- Footwear: Sturdy, closed-toe shoes provide essential foot protection.
Expert Tips for Buying Timber and Materials in New Zealand

Purchasing the right materials is crucial for the success of any DIY project. Here are expert tips for buying appropriate timber and other materials in New Zealand:
Timber Selection
- Native vs. Imported: Consider native New Zealand timbers like pine or macrocarpa for sustainability and ease of sourcing.
- Grading: Understand timber grades to ensure you select the right quality for your project.
Material Quality
- Check for Defects: Inspect timber for knots, cracks, and warping.
- Moisture Content: Choose materials with the appropriate moisture content to prevent future warping.
Sustainable Choices
- Certification: Look for timber with sustainability certifications, such as FSC (Forest Stewardship Council), ensuring responsible sourcing.
Additional Materials
- Fasteners: Invest in quality screws and nails suitable for your project.
- Adhesives: Choose adhesives designed for woodworking applications.
Local Suppliers
- Support Local Businesses: Consider purchasing materials from local suppliers to reduce environmental impact and support the community.
- Ask for Advice: Seek guidance from knowledgeable staff at your local hardware store for the best materials for your project.
Step-by-Step Guides for Small Projects

Building a Simple Shelf Unit
Materials:
- Plywood
- 1×2 pine boards
- Wood Screws
Steps:
- Measure and cut the plywood to the desired shelf size.
- Cut the 1×2 pine boards to create the shelf supports.
- Assemble the frame by attaching the supports to the plywood with screws.
- Mount the shelf securely to the wall using appropriate anchors.
Tip: Experiment with different finishes, such as staining or painting, to personalise your shelf.
Constructing a Garden Planter Box
Materials:
- Cedar Boards
- Wood Glue
- Deck Screws
Steps:
- Cut cedar boards to the desired lengths for the planter sides.
- Assemble the box by joining the sides with wood glue.
- Reinforce the corners with deck screws for added stability.
- Drill drainage holes in the bottom to ensure proper water flow.
Tip: Line the planter with landscape fabric to protect the wood and improve drainage.
Embrace the learning curve.
Embarking on these DIY projects allows you to cultivate foundational skills while experiencing the joy of creation. Remember, each project contributes to your growth as a builder. Start with smaller ventures, gradually progressing to more complex undertakings as your confidence grows. Take a look at our article on decks and fences for advice on building in New Zealand.


